How to learn machine polishing?
Machine polishing is not rocket science. However, if you want to learn how to do machine polishing correctly and achieve great results, it requires an understanding of several different factors. Most newbies look for the “best polisher”, the “best compound”, or the “best pad”, hoping that if they find one, they will achieve professional results. Unfortunately, it doesn’t work like that. Let me give you an example. If I want to draw pictures as well as famous artists, having, and I will buy brushes, paints, stand etc as they use. Will this make me an artist as good as them? I think you know the answer……
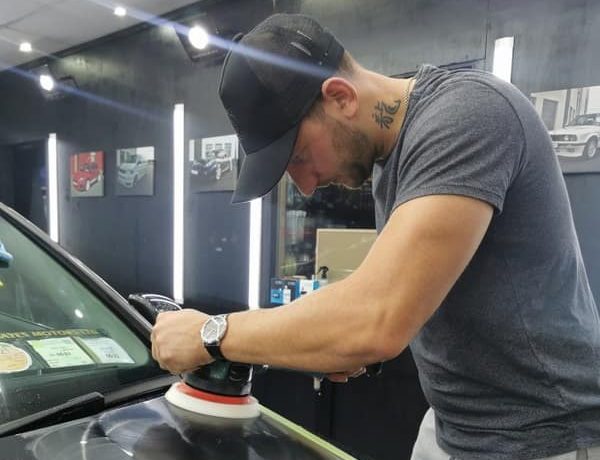
Thankfully, machine polishing is not as hard to learn, but remember, the best tools don’t exist. In the case of polishing, as in any other trade, the hands with the right tools give the result. So, where to start? Before you think about machine polishing, you should start with preparing the paintwork. A simple wash is not enough. You need to clean the paint deeply, remove the road film, remove tar and iron fallout and then use a clay bar at the end to remove anything that may be remaining on the surface. Check my video, where I explain step-by-step how to perform this process.
The best polishing machine.
The next step to learn how to do machine polishing is to choose equipment and products, which may be challenging. The wide choice of polishers doesn’t make the choice of first polisher simple. So, let me explain to you how I would approach it. These days, we have three types of polishers available on the market: Dual Action, Gear Driven Dual Action and Rotary:
Dual Action: the safest & easiest one to use
Gear Driven Dual Action: relatively safe & demanding to use
Rotary: Very difficult and time consuming to learn
So if you are considering buying your first polisher, I recommend dual action. Dual action polishers come with various throws. The throw is the size of the orbital movement that the dual action polisher provides. 9mm, 12mm, 15mm and 21mm. The bigger the throw, the bigger the cutting power the polisher offers. The smaller the throw, the more straightforward the machine is to use, and the better and easier finish the polisher offers. Check my video to see in-depth the difference between polishers.
Polishing pad and compound.
Compounds and polishing pads. The choice is probably even harder. Ideally, you should buy three compounds ( heavy cut, medium, and fine) for the start. Regarding polishing pads, it is also worth having three different gradations. But I recommend having at least three heavy-cut pads because this step is usually the most intensive. Rotating the pads during work will improve the progress and increase their lifetime.
Make sure your polishing kit also includes a Panel Wipe. This product will help you remove the compounds properly after polishing. Thanks to the panel wipe and inspection light, you can trace the accurate result of your work. Panel wipes and inspection tights are your control measures; without them, you don’t know the result, as wiping the paint with a dry microfibre cloth removes only some residue of compounds.
If you are looking for an entry-level polishing kit, we have one. Click here. What is the difference between different generations of polishing pads and compounds? Both compounds and pads offer different levels of abrasive :
Heavy Cut – high abrasive, lower level of gloss
Medium – medium abrasive, medium level of gloss
Fine Cut – low abrasive, high level of gloss
Various polishing compounds and pads allow you to choose the most suitable compound and pad combination.
The right combination of pad and compound?
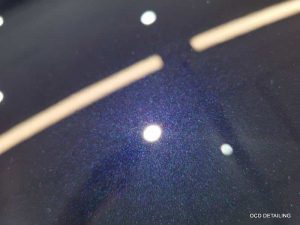
This is the tricky part, but once you learn how to assess the result after polishing, it will be easier and easier. When choosing the combination, you need to consider two factors: the condition of the paint ( damage level) and its hardness. To check the damage level, you need to use an inspection light. Assessing the paint in daylight, flood lights, etc, will not give you the proper view. The main characteristic of the inspection light is that it imitates sunlight and needs to be focused. To check the hardness of the paint, you need to do a panel test. Testing the panel will give you an idea of whether you are dealing with hard, medium or soft paint.
How to do it? Use your polishing machine, medium pad and medium compound. Apply four pea-size drops on the pad and spread it on the panel ( roughly area 3×3 size of your pad). Once you spread the compound, do four -to five passes with your polisher; in this area, with the higher speed of the polisher, apply a bit of pressure on the polisher simultaneously and move the machine slowly. After that, wipe off the residue of the compound with a dry microfibre cloth, then spray the panel wipe and wipe off again with a second cloth. Now use the inspection light and check what result you got from that. Considering the paint is in bad condition at the start, here are some possible results after the test:
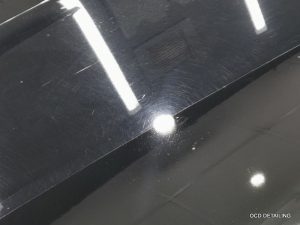
1. You are removing a lot of imperfections, but the finish is hazy, and some buffer trails occur; in this case, it means that you are dealing with soft paint
2. You remove many imperfections, and the finish is relatively good. This means that you are dealing with medium paint.
3. If you are removing only some minor swirl marks or achieving only some improvement, and the gloss level is VG, then you are dealing with hard paint.
Once you test the panel, you should know how to approach the next step: choosing a heavier or softer combination. A heavier combination will give you more cutting power, removing imperfections quicker but with less gloss; a softer combination will have higher gloss but lower cut.
How to remove swirl marks?
To understand what machine polishing does and learn how to do machine polishing properly, you must also understand the paint. The thickness of most factory paints is roughly 100-140 microns, and 1000 microns equals 1mm. So, the whole depth of the paint is about 0.1 millimetres.
In everyday talk, we say we remove swirl marks, scratches, etc.; however, in real life, we remove tiny layers of damaged paint. So, the most important thing is that you understand that you can only fix imperfections in the paint within the depth of the clear coat. Not all imperfections can be removed with machine polishing.

Once you are aware of how thin the paint is, you can proceed. Overall, the fact that the paint is so thin doesn’t mean that you will remove all the paint so easily unless you are careless and start to work aggressively on very soft paint. Fixing damaged paint requires much time and effort, especially for harder paints.
The goal of machine polishing/paint correction is to remove as many paint imperfections as possible ( safely), leaving a flawless, hologram-free finish. Various combinations of compound pads and polishers can achieve unbelievable results. But as I mentioned at the start of this blog, the tools alone will not give you the results.
To make machine polishing effective, you must understand what happens when you use your polishing combination. A polishing machine with a compound and pad creates friction, removing a paint layer. There is no magic; it’s all physics.
The polisher provides motion for your abrasives.
The polishing pad provides abrasion.
The compound provides abrasion and lubrication.
So, to achieve results, you need to choose the right polishing combination and, more importantly, create the appropriate friction while using a polisher. Here, I will give you a list of factors that will significantly improve your polishing once you implement them while polishing. This will help you to learn how to do machine polishing.
Other variables
Area—As you can imagine, working on the specific area size will give you some results instead of working on a full or half of the bonnet at one time. From my experience, the most optimal area for polishing at one time is roughly 16×16 inches (or 3×3 size of your polishing pad).
Speed of the polisher—There is no set speed for machine polishing. It all depends on the hardness of the paint and what you try to achieve. The faster the polisher works, the faster it will remove the paint. During polishing, you must determine which speed gives you the best result. Always consider that the faster the polisher will work, the more heat there will be; heat is the side effect of friction, so you need to control it.
Pressure on the polisher—You can let the polisher work without pressure, but if you understand that friction mainly removes the paint, you will speed up the process. Pressure will increase the friction. This will make a massive difference in the work time, especially during the first step when you try to remove imperfections. But be aware that when you use a dual action polisher, applying too much pressure will slow down or stop the motion of the polisher; in a result, you will decrease the performance significantly.
Your speed ( technique)—Most people overlook this. Overall, the faster you move the polisher, the slower your progress is. If you work slowly, you let the polisher to work ( to create friction on the surface) in a result, you remove the paint quicker ( more effectively)
The number of passes. How many times should you run the polisher over the area that you are polishing at the time? This also varies, but to give you an answer, you should take a look at how compounds work. Most modern compounds have diminishing abrasive particles. This means the compound has its full potential only in the first 2-4 passes.
After that, the compound breaks down from the friction and becomes less abrasive. To get the most from the compound, you should, from the start, use a higher speed, some pressure, and work slowly; this way, you will use up the compound’s properties most effectively. After that, you can release the pressure, drop the speed, and do, for example, one or two light passes; this may significantly improve the finish. It’s pointless to do 15 or 20 passes with the same compound. Four to eight effective passes will give better results than 20 without the right speed, pressure, etc.
Position of the polisher. Effective machine polishing also requires some other things. When you use the polisher, try to keep the polishing pad as flat as possible on the surface. This will give you the best progress and results. Tilting the machine will stop or slow the polisher, but it may also cause “buffer trails” or a hazy finish.
Polishing pads. Another essential thing to know is that polishing pads clog up during use. That’s why it is crucial to clean them when they need to be cleaned. We clean pads after every set of passes; this allows us to achieve constant results. Also, be aware that during polishing, your pad may get softer; this is a side effect of the friction. So, ideally, you give your pads to rest after each set of passes. Use a minimum of 3 heavy cutting pads, and work with one pad on the section, then use the second pad for the next section and a third one. After a few minutes, your first pad will be ready to use again, as its hardness will return as it should.
To recap this article, how to learn machine polishing? Machine polishing isn’t overly complicated. However, it takes time to learn it. Years ago, as a newbie, I made mistakes that nearly everyone who tries to learn does. I mainly thought that the secret was in the products. Today, after doing it for almost 15 years, I am fully aware that to get results, I need the appropriate compound, pad, and polisher, but above that, I need to implement all other factors that create friction, like speed, pressure, etc. But I mainly need to concentrate on the paint’s hardness and the damage level. Only then can I adjust all the above factors to achieve the desired result. Thanks for reading. If you like this information, please comment in the comment section and let me know your thoughts.